I am meant to make this tutorial ages ago, lol, but in light of the contest I am aware that many of you want to get involved and probably don't have Maya for custom models that you have possibly found online or maybe you want to make models yourself.
Well fear not! You can use the popular open source 3D Modelling software, Blender! Video version soon.
So before we get started, here's a few things you should have:
Basic knowledge of Blender. Image Editor (Photoshop, GIMP, Paint.net, etc. NOT MICROSOFT PAINT) Texture that is power of 2 (I'll go over making a texture that is Power of 2) and is TGA, JPG or DDS. Model
So to start off we're going to get ourselves a texture, I am going to use this metal texture.
Note: if your texture is a power of 2, then you can skip the PS part.
So this texture isn't a power of 2, EEK! Wait, no problem, open it in an image editor, I will be using Adobe Photoshop.
Open the file in Photoshop, then go to Image>Image Size...
This will open the Image Size dialogue box, you may also notice a keyboard shortcut, you can use that also.
First thing, un-tick that chain, what this does is maintain's aspect ration, we do not want that in this case.
Like I said your image has to be a power of 2 or you'll get an error when converting it later. You can mix resolutions, i.e. you can go 256x1024 or 512x1024, in this case I'll make it 1024x512 to make it as close to the original as possible.
Note: I recommend not going above 2048x2048 and stay around 1024x1024 or lower so your map isn't full of textures 50mb in size.
So once you have your resolution set press Ok, you can see this how mine came out after I changed it.
Once you're done you can go to File>Save as (Export iirc for Gimp) and save it as TGA, JPG or DDS, if your texture has transparecy or holes such as a fence then use DDS DXT5.
If you're using Photoshop you can use the NVIDIA Texture Tools, I can confirm the DDS Saving works in 2015 but can't get the normals part to work.
Save it to texture_assets in your CoD WaW root, make the folder if it doesn't exist.
Now we're done in Photoshop.
///////////////////////////////////// Tutorial on Blender Starts here
If you don't have Blender download it by Clicking Here. It's free, so grab it.
Next Download Blender-CoD by Clicking Here. The latest one he seems to have doesn't seem to work for me, so the link is to the latest one that worked for me. His official page is here on Github: https://github.com/CoDEmanX/blender-cod
Open Blender, you should see a screen similar to this:
Just click anywhere in Blender to get rid of the Slash screen that you will probably get when starting Blender.
Go to File> User Preferences, then click the Addons tab then Install from File. Locate the ZIP of Blender-Cod you downloaded earlier and install it.
Then click "Testing" and it should show up, there will be a box to the right, tick it and then Save Settings.
You will notice 3 new entries in Import and Export, 1 for Importing Xmodel_exports, 1 for exporting Xmodel_exports and 1 for exporting Xanim_export. We will not be covering xanims.
Make sure to double tap a to selecting everything in-scene, then delete, the sun, camera, etc. will cause errors.
I also recommend importing the xmodel_export of the character from model_export/characters/american/roebuck, this is the size of the player, so you scale your models based off him.
So I have made a basic cube and UV Mapped it as shown below, once again I will not be covering Blender basics such as UV mapping, there are other tutorials for that.
Note: When UV Mapping you may get the error "Object has non-uniform scale, unwrap will operate a non-scaled version of the mesh" when you Unwrap and then it will look weird, as if you can see the inside faces, in editor and game. Thanks to JBird632 informing me what cause this, to fix it, select the offending mesh in Object Mode, press CTRL+A and select Scale, job done. I would avoid using Unwrap though for the most part if I were you.
Looks good, huh? You will learn to worship this Iron Block as you worshiped Bwc's Purple Square.
Next we need to give the mesh a material name, this is the material name you will also be using in Asset Manager.
Go to the side bar and go to the materials tab, then make a new material with the mesh selected and give it a name, I usually like to use this format: mtl_*map I am working on*_*what it is*_*surface type* and possibly _*color* as well.
So I will call this mtl_tutorial_block_iron like so:
All the other settings do not matter as they are specific to blender. The texture's tab need not be touched also.
Note: You may have 2 seperate meshes in your scene that you want to use the same material, but you find when you enter the same name for both of them blender adds .001 to end of one of them, this is because 2 meshes cannot have the same Material name in Blender, what you can do is click the meshes that you want to use the same material name for, and press CTRL+J, this will make them all the 1 mesh, and allow you to give them a material name for all of them since they are now 1 mesh essentially.
Now we can select everything we want to export, then go to File>Export>CoD XModel. Save it under model_export as any name you want.
Now we are done with Blender.
/////////////////////////////// Assman Stuff Starts Here
Now to convert it so it works in-game.
Open Asset Manager via Launcher or via your Bin Folder, then create a new GDT in model_export and save it.
Go to material and create a new entry(ies) with the same name you gave to the mesh(es) in Blender.
I created mine like so, you can use different settings for surface type, etc.
You may notice Normal Maps, Spec Maps, etc, mentioned, you can create them for your model, refer to JohnDoe's tutorial here:
Then press F10 or go to PC Conver>Current Asset Only to convert the material(s).
Next for the xmodel is pretty simple and not worth screenies for, just create a new xmodel entry, name does not matter, name it what you want, and add your Model to the filename. Make it rigid unless it's animated.
You might be asking me what do the LOD's mean, they stand for Level of Detail and adding LOD models that get lower in quality will mean that the further the player is from the model, the model's quality will drop and it swaps out for a lower LOD model.
Now we can use the model in any fashion we want! You can use Asset viewer to view it or add it in Radiant, if you add it in Radiant then there is no need to call it in mod.csv, if you use it in a script then you will need us xmodel,*name of model* in mod.csv.
Also make sure to add the images to your mod's images folder and tick them in Mod Builder.
Keraven, set in a lost town in the United States, sees 4 survivors of the recent virus outbreak caused by UGX Labs. The 4 find a town to take camp in and survive, can they fight off all the infected? Only you will find out.
Map is set in a fictional town called Kenaven.
More info later as I work on the map.
Spoiler: click to open...
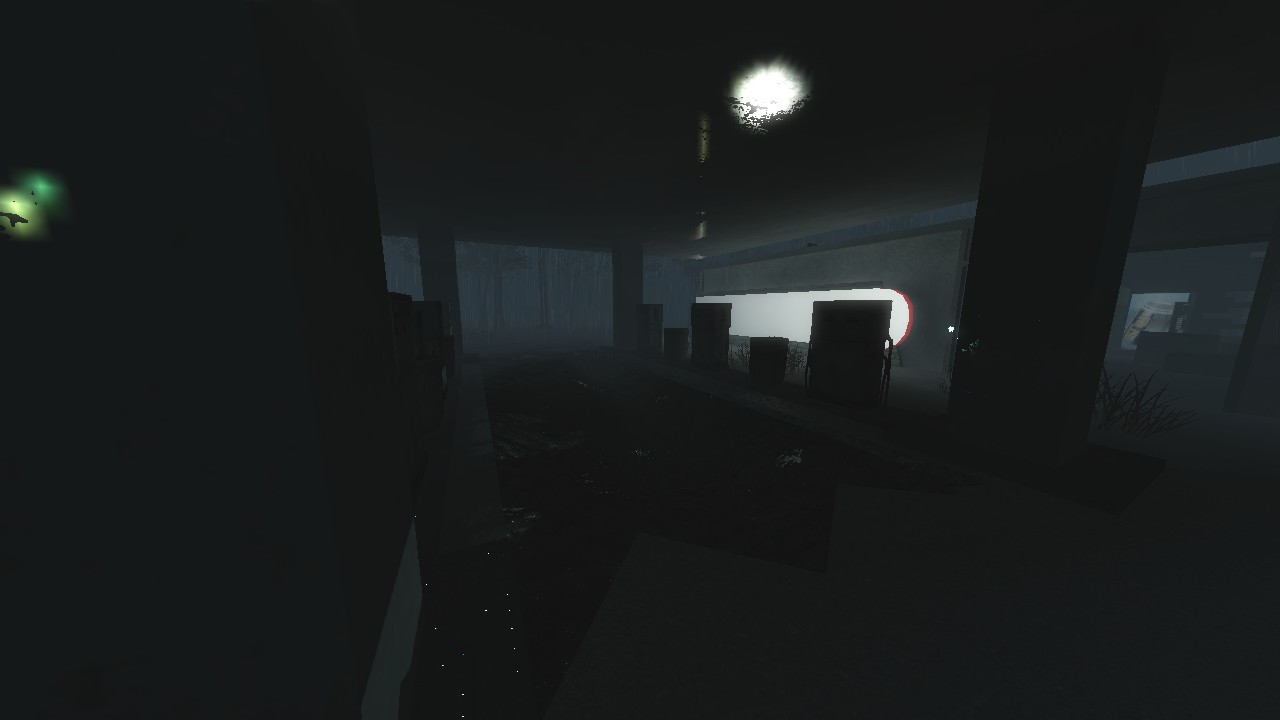
EDIT @ 03:19PM: New screenshot Added. Double Post Merge: June 30, 2015, 11:42:14 pmSome updated pics in-game, 1st pic needs a bit of work and if anyone has suggestions for textures for it, etc, I would appreciate it.
Spoiler: click to open...
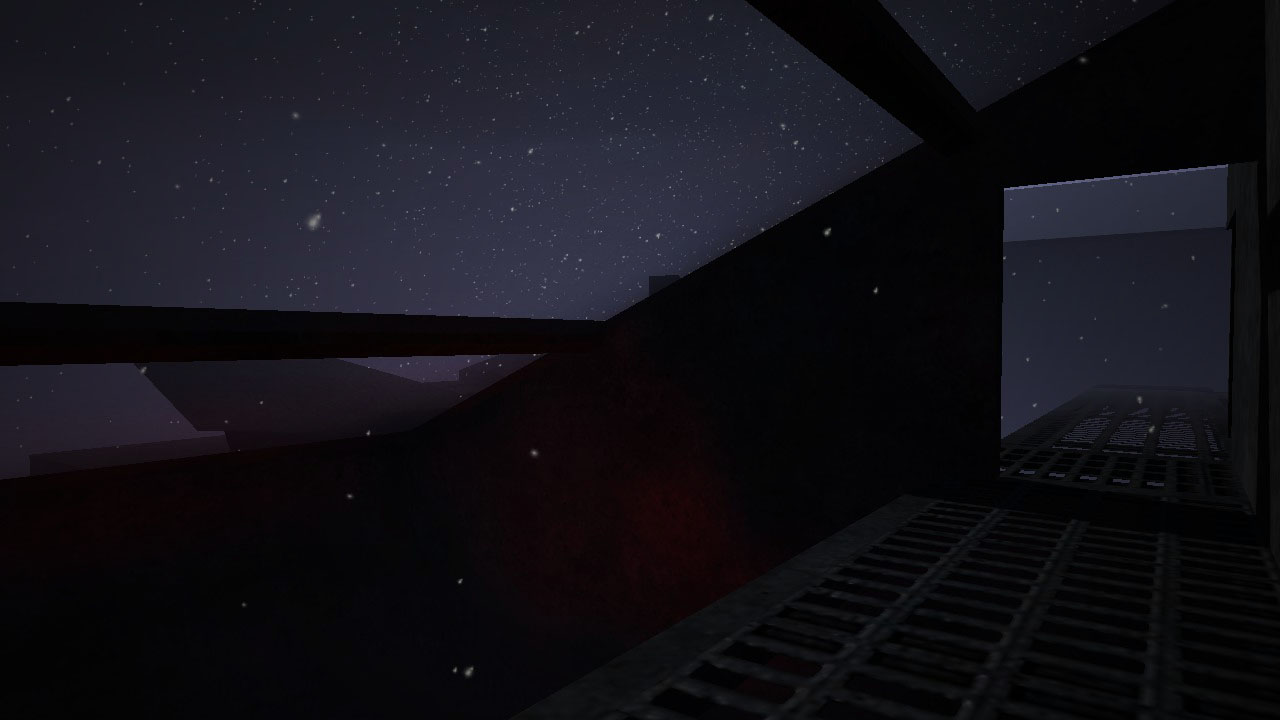
Edit 10th July 1:14AM: Added more screenshots showing off Gas Station, etc..
So as the horrors of Frozen Nightmare come close to a release I hit a big stone in my adventures in mapping.
I had several issues before with pathing with paths not activating when a door was opened, fixed thanks to HitmanVere.
But after testing my map a bit I noticed they don't like the platforms on my map, after dwelling in ai_shownodes 1 I found this bundle of fun:
As you've probably guessed, the way they are supposed to look is on the platforms, not connecting to random paths on the ground and dropping to the ground.
This is how I have it set-up in Radiant:
They are script_brushmodels, I put clips under them to see if that helped, it didn't. Anyone who can assist I would be most grateful. This is one of few issues that are holding me back.
Decapitator 2 is a map by MaTTDu53, featuring custom weapons, perks and more.
I really don't know what the map maker was going at with this one, is it a troll map? Was it made to be a funny, piss take of a map? I don't know, but with this mind, I am reviewing this map as a serious map.
Pros:
Contrary to what you might think from looking at this map, it actually features quite a bit to praise it on.
I will start with the custom weapons, as stated on the thread it features 4 weapons from other games, such as FC3, Bioshock, etc. I was able to get my hands on the Triple R Machine Gun from Bioshock Infinite, it's really nice to have some extra guns in the map so +1.
The high amount of custom perks makes life a bit easier on Decapitator, 10 perks are to be found including some like Vulture aid, Mule Kick, Electric Cherry (< No FX for this for some reason though) and others.
UGX Jukebox was by far my favorite addition. Yes, with all the other stuff this is my favorite. There's nothing like being able to put on some tunes while playing, nice to see it added, don't know why other people don't add it since it's on the Wiki and easy to implement.
In the view area department, custom view-hands and HUD are to be found, I don't know if it's just me, but I dispise the default view-hands, so it's nice to see custom view-hands (which I believe are from CoD 4) in the map, the custom HUD is also a nice addition, and like Jukebox, more people should add these due to their availability.
Cons:
Let's start with the textures; they became repetitive, very repetitive, very fast. No detail + bad textures = not fun map.
That is also another point: There's virtually no detail in the map. Maybe a few xmodels and boulders here and there but that's it, nothing to add that immersive feeling to the game like broken stuff, etc.
The runners and high amounts of zombies = no no, it's a bad way to make an easy map hard, if your map is too easy, add obstacles, increase door prices, etc. but don't make zombies runners from round 1. You are supposed to advance in zombies along with zombies getting harder gradually with rounds, not have 20-30 zombies on you at round 1-2 along with -500 points.
That last door price is a major bad point, 15k? I know points are easy to get, but it's hard to build to that even with that in mind, 15k should be to a last stand area, not to open a door to Jug and the Power and the Box.
To sum it up: The custom content i.e. weapons, perks, HUD were all let down by the map's design and layout. I feel it could have been done better.
Detail: 3/10 Custom Content: 8/10 Fun Scale: 5/10 Replayability: 2/10
The map Farm 2.0 is a remake of the ever loved map Farm from Green Run in Black Ops 2 by DuaLVII. Now this is what I call a remake, not only did DuaL remake the map, he also stretched further and added extra features, most noticed are PHD and Electric Cherry and the Weapon Level system, which we'll get onto.
Pros:
It's hard not to find something to praise this map on, the Weapon Level system is a very nice addition, I found myself with a Colt M1911 Level 6 comfortably using it at Round 8, it is a nice replacement for Pack a Punch, allowing players to increase their weapons stats by getting kills and shooting zombies. Killing zombies, Shooting them and knifing add to the weapon level's XP.
PHD is a very welcomed addition for me and is a must on the map, if you play the map without PHD you'll know how explosive effect your player gets can be annoying after killing a zombie on fire. PHD completely removes this effect, you'll find yourself also trying to jump off high ledges a lot, PHD is very useful there also.
Electric Cherry, while not a necessary perk, is very useful at the highrounds, it works as expect, killing zombies upon reload and radius of the electricity is dependant on ammo in clip while reloading. I found it very, very useful at high rounds.
Ahh and the zombies bosses, good 'ol Brutus and the hated loved Napalm Zombie. And what's even better, don't like them? You can turn them off, both can spawn at any given time and are pretty strong, but they add that sense of challenge to the map and thus I consider a good inclusion.
Last but not least: I loved the HUD and Custom Round Icon and sound, the HUD was very well done, the custom round icon and rotating box when changing rounds might have been a small thing but it was cool. The perk shaders on the HUD were also cool, 4 Perks shaders would be on one line and your last 2 perks would be above them.
Cons:
The only thing I can say was a little disappointing was the delay on the Claymores, the delay on a small map meant by the time the front zombie had passed the claymore, it was only going off, it made them for most part useless for defence.
Conclusion: The map is a very, very good remake, like I said earlier, DuaL did not only replicate Farm, but he went further with bosses, extra weapons and feature such as Weapon Level.
Level of Detail: 9/10 Custom Content: 8/10 Fun Scale: 8/10 Replay-ability: 9/10
The Basics: Stranded is a map by ProRevenge, being his first map I was quite impressed with it. We all know 90% of new mappers are known to release box maps as their first map, so for Pro to release a map with such detail and custom features like this, is quite impressive.
Pros: Like I mentioned the level of detail was impressive, even when compared to mappers who have been mapping for quite some time.
I like the inclusion of custom weapons over the original weapons, you will find Black Ops 2 and Black Ops 1 weapons on the map, strategically placed Perk machines also gave the map that extra bit of difficulty, perks such as Jugg can be a bit hard to get, but this also balanced out by the nice amount of wall weapons that are on the map.
The map is a lot of fun; while camping is possible it is very easy to get overrun by zombies and thus it stops the player from camping in the one spot. There were quite a few new perks from newer Zombie maps in Black Ops and Black Ops 2 which gave the map that extra bit of replayablity.
Cons: The only bad thing I have to say about this map is its replayability. While I did find myself playing this map a few times over the problem is, is once you have all the doors open and have gotten all the perks, PaP’d, there’s nothing else to do. I feel the map could have done with an easter egg of some sort or maybe extra rooms or something to give something that made me really want to come back for more.
Level of Detail: 7/10 Custom Content: 7/10 Fun Scale: 8/10 Replayability: 6/10
I made this model because #1 It's easy to make #2 People probably want it to use in conjuction with a script.
This is not ripped from Black Ops 2, it is remade in Blender by me, textures are also not ripped, if you are skeptical about whether or not I made this mode please refer to the video below demonstrating me making it.
To install:
#1: Add all model to root\raw\xmodel.
#2: Add this to mod.csv:
Code Snippet
Plaintext
xmodel,powerup_zombies_money
#3: Compile map, if you added it to the map using misc>model you should see, if you used it in conjunction with a script then it should show up.
Download below as an attachment.
Screenshots:
In-Game:
Video of me creating in case anyone has any inquires on whether it's raw assets or not, I made it.
Pretty much? I can't get custom sounds working, nor will ModSound work.
Now I'll get descriptive; I was originally trying to get custom "stings" (when you buy the perk sound) to work, I tried porting the ones from MOTD as a test, putting the file in my sounds with the same name as the alias' file did not work.
So I decided to created a new alias for my new file and change it in _zombiemode_perks.gsc, and as you guessed didn't work.
I tried uploading it as an attchment, UGX didn't like this and gave me an error. If one of the admins can correct this that would be great, for the moment use the Mediafire download.
I was on the chat yesterday ( ͡° ͜ʖ ͡°), when someone posted a link to these "Modern Perk Shaders", they looked pretty neat, but it was ProRevenge's comment that they didn't match the original zombies style that got me thinking, so I decided to remake them with the original zombie's badge (the part behind the perk icon).
While I did get the inspiration from Deadnaut who made the original Modern Perk Shaders, these are completely made by me and I did not use his as a base. You can download his ones here: http://www.zombiemodding.com/index.php?topic=16593.0
What's included??
Inside this .rar file, you'll find 4 Folders amrked with perk names.
Speed Cola doesn't have a PSD because I accidentally saved it's PSD at 64x64 and it wasn't recoverable, I'll remake it later.
How to Install?
They are pretty easy to install.
Go to your Mods Folder in your root directory, locate your Mod's folder, if you don't know where that is:
Please note: 64bit Users will have (x86) at the end of their Program File's directory since World at War is a 32Bit Application, 32 Bit will go to C:\Program Files\
For DVD Users:
Code Snippet
Plaintext
C:\Program Files (x86)\Activision\Call of Duty World at War\mods\map_name
For Steam Users:
Code Snippet
Plaintext
C:\Program Files (x86)\Steam\steamapps\common\Call of Duty World at War\mods\map_name
Inside this folder create a folder "images" if there isn't already.
Simply put the IWI files from the other folders into there and tick them in the Mod Builder in Launcher, you don't have to do anything after this, the game will use these instead of the originals.
In-Game (didn't have Jug on this map):
To-Do:
Black Ops 1 Perk Shaders Black Ops 2 Perk Shaders Power Up Shaders Round Icons HUD Icons
If you would like me to make you a custom perk shader for your map please be very descriptive in what you want and PM me on here.
Before we start I recommend downloading Notepad++, click here to download it.
In this tutorial I will be explaining how to add a FOV Changer/Slider.
I looked around the forums and didn't see a tutorial for this, so after I figured it out myself I decided to show other mappers how to do it. There are 2 Tutorials here, one for a simple changer, and the other for a slider. Both work perfect without cheats enabled, both can also be enabled at the same time, and changing one of them will change the other, so they don't conflict.
For the Changer:
This is simply a button that has set values (like changing Console from On or Off), go to root/raw/ui and locate the file "options_game_pc.menu".
Back up this file to somewhere else as we will be editing it.
Right click on the file and click "Edit with Notepad++", I recommend associating .menu files with Notepad++.
// FOV Changer
CHOICE_DVARFLOATLIST( 27, "Put what you want here as this is what the option will show up as, i.e. Change FOV", cg_fov, { "Normal" 65 "Medium" 75 "High" 90 }, ; )
You can change the quoted part above where I said "Put what you want" to what you want, this is what it will show up as in game, like where you see "Enable Console" in the options.
For the parts where you see "Normal", "Medium" and "High", there are what the options will say, like when you enable console it will say "Yes" or "No", as for the numbers beside them, these are the FOV values, so 65 is FOV of 65, equivelent to using command "cg_fov 65", you can add more here and change the values to your liking.
Now once you can save the file, you don't need to compile map for this, just Build Mod, once you get into game it will look like this:
For the Slider
Folloe the above for copying and opening the file.
For the Slider, look for this on line 61 (or around there):
// FOV Slider
CHOICE_DVARSLIDER( 28, "Put what you want here", cg_fov, 65, 65, 90, ; )
Once again, Put what you want where it says that, as this is what it show up as in the menu, like "Enable Console".
You'll notice 3 Values, the first one is the default value, I leave this at 65 because that's WaW's default, but you change it to maybe 70 or higher if you want.
The second value is the lowest value the slider will go, so if you slide the slider furthest to the left, the FOV will be at 65.
The third is the highest value the slider will go, so if we slide it furthest to the right, the FOV will be at 90.
This is how it looks in-game:
Last but not least, in Mod Builder tab in Launcher, for your Mod, add this to the mod.csv:
FrozenNightmare Set in Modern 2015 Germany, Frozen Nightmare, set in an old Nazi Base that was never discovered after WW2, see's 4 friends exploring Western Germany's beautiful countryside and forests during their Summer Holidays.
As they were driving along an unmarked side road they noticed a sign saying "Testanlage: 145", translated to English means "Testing Facility: 145", one of the guys in the group, thanks to modern day technology, pulled out his smartphone and Googled it, but to no avail, they decided to continue driving to see where the trail would take them to.
A few hundred meters down the trail and the noticed yet another sign which said "Autorisierte Personal Nur", which translated meant "Authorized Personal Only", not to far down the trail again they saw another sign which strangely was in English, said "KEEP OUT!! DANGER!!", it was also in a red liquid but the group didn't stop to investigate, they continued driving because who listens to warnings? No one, correct, free cookie for you.
A mile or so down the road they noticed an entrance into a tunnel that went under a hill, they noticed bard wire at the top of the hill and to the side of the tunnel there were 2 signs with the same text as the 2 first signs, they dicded to drive through the tunnel like idiots. The driver decided to reach into the glove box to get the map to see if he could find this place on the map, but before he could open the glove box his friend shouted and as he looked up he saw a figure, he was in too much shock trying to avoid the figure to attempt to make out what it was, all he knew is there was a weird glow from its eyes.
The walls and ceiling of the tunnel eventually gave up and collapsed behind them, they continued driving up to the end of the tunnel and found themselves in a base of some sort, they started looking around but before they could, they noticed creatures with the same unusual glow to their eyes as the original figure they saw in the tunnel, the creatures proceed to attack the group, they run and find an armory, one of the friends in the group finds M1911's stored in an armory along with other guns but they were empty, they return to the car to defend themselves, this is where you take over.
Planned Features (Subject to change): Black Ops 1 Guns (Some Black Ops 2 Guns) Black Ops & Black Ops 2 Perks Kino Style Teleporter Easter Egg involving attempting to find out what happened Buyable Ending
And much, much more to be announced!
[/b]
Current Progress:
Map Planning
100%
Map Geo
45%
Custom "Frozen" Perk Textures
40%
Easter Egg
15%
Beta of current work available to those who use the Beta Request System below. Beta will be released once I think the map is close to ready.
Screenshots of current map:
Spoiler: click to open...
Think of something that this map could do with? Let me know below, my scripting skills aren't great, so if you think a feature would suit this map and would like to script it, let me know, full credit will be giving to those who properly Beta Test the map, help out with stuff such as error fixing and scripting and to anyone who has released scripts, models etc. to the public that I used.
Ok so when I play on the map I'm working on as you can see the zombies get stuck at pathnodes or at the window itself, some will go the window and break it and come through but some won't, I've tried placing the path nodes as close as possible to each other but that won't help, other windows are fine and some aren't, appreciate any assistance on this.
 Show Posts
 Video version soon.